Being a web developer nowadays can be lots of fun thanks to powerful and affordable (mostly free!) tools. Visual Studio Code (VS Code) is one of these tools and places itself among the most popular code editors with many developers using it and contributing to its development. I’m honestly super-impressed by the speed of development and look forward to each month’s feature-packed release.
After my switch from Atom to VS Code a few years ago, I learned about many useful customizations and extensions. It improved my workflow a lot and I want to share the most helpful ones with you — hopefully you’ll find them useful, too.
And if you’re completely new to VS Code, you might additionally want to check the (very concise) official docs. I mostly embedded links to the relevant setup guides though anyway. Also, all shortcuts are indicated for Mac OS and might slightly vary for other operating systems.
Code Analysis
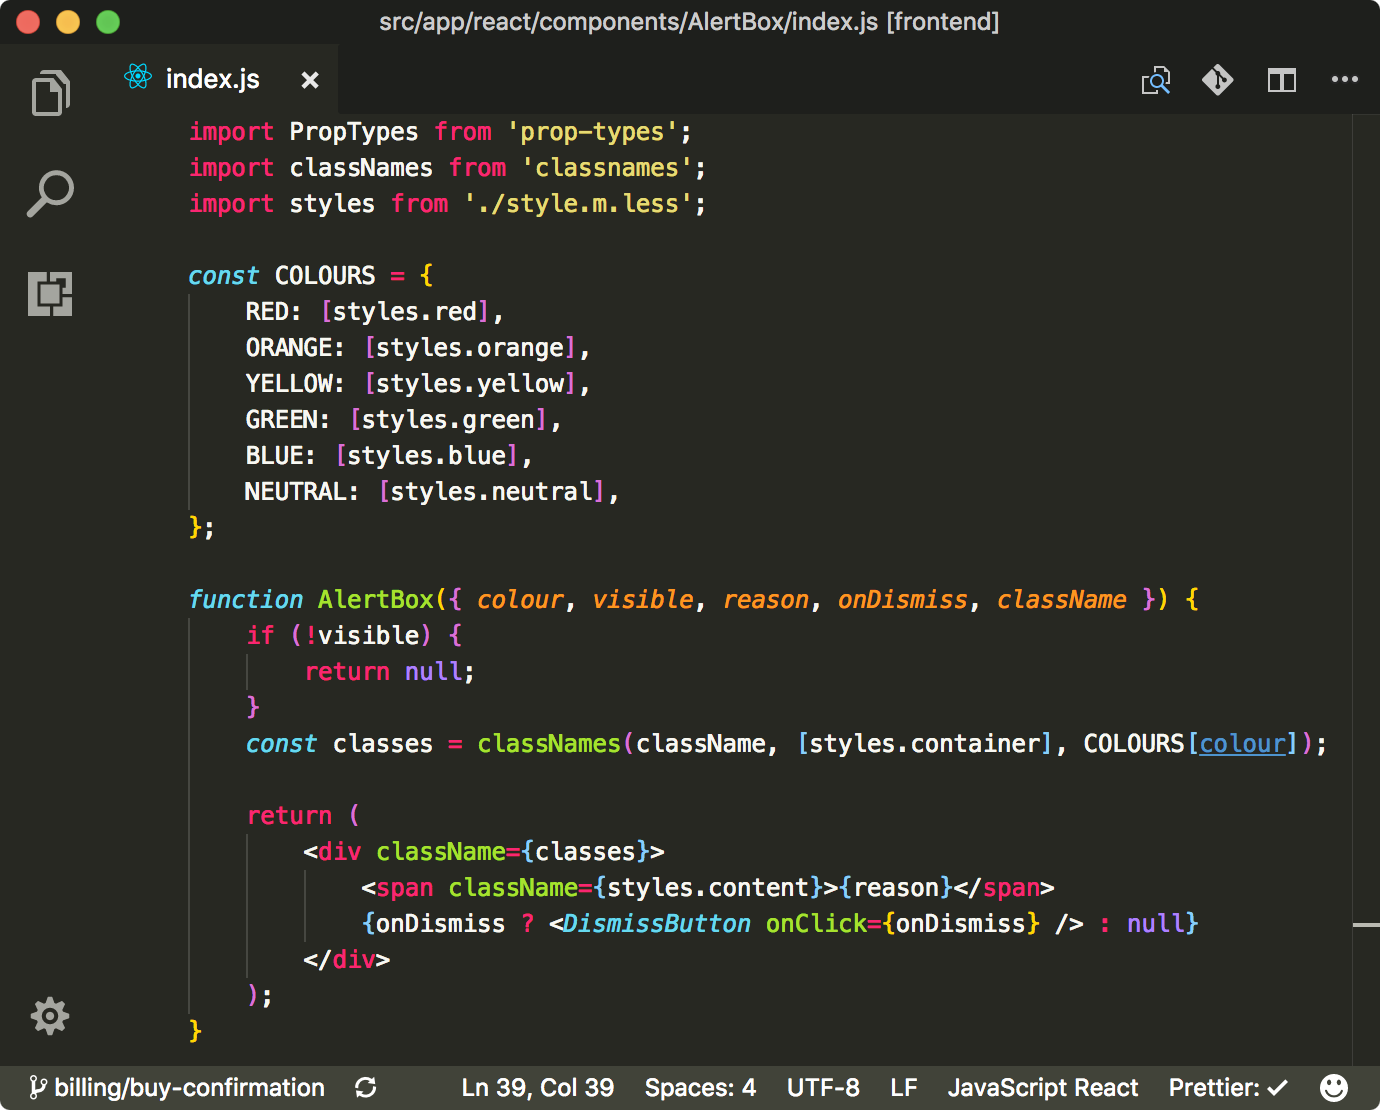
Linters are a great way to check your code statically and find errors before you run into them during runtime. ESLint is the most common linting tool for JavaScript but you can even go beyond that, e.g. with HTMLHint and stylelint. Generally it makes sense to integrate the same linters in your editor that are being used within the build pipeline — this way you keep those tools in sync and profit from direct feedback within the editor: errors will be showing up inline, inside the Problems panel and affected files will be highlighted in the filetree.
VS Code’s IntelliSense engine can be pimped with extensions, too, to provide additional auto completions, definition lookups and more. Here are my favorite IntelliSense extensions:
- Path IntelliSense (auto completion for paths in your project, great for relative module imports)
- npm IntelliSense (auto completion for installed npm packages)
- IntelliSense for CSS class names (CSS class auto completion for HTML files)
- Less IntelliSense / SCSS IntelliSense (auto completion for variables and mixins)
Code Manipulation
Formatting
I’m always surprised when people indent and “beautify” code in their editors manually — this is a step that can be easily automated! VS Code has an integrated formatter that can be triggered via the Format Document command or automatically by setting the editor.formatOnSave setting to true.
For advanced formatting that takes into account your existing .jsbeautifyrc, .prettierrc or .editorconfig files, you should take a look at the extensions Beautify, Prettier and EditorConfig.
(Custom) Snippets
If you happen to work in a language or framework that repeatedly uses similar structures (hint: that’s very likely!), it makes a lot of sense to use snippets to quickly insert the boilerplate you need. You’ll find a lot of snippets extensions in the extension marketplace. Here are some example use cases:
- adding basic constructs like classes and functions
- adding components, services etc. for React, Angular or Vue
- adding style files with commonly-used imports
- quickly logging to the console — although there’s also an extension for that

Setting up custom snippets is also super-easy, so you can always create your own ones if your specific use case isn’t covered by an extension. Make sure to take advantage of placeholders (e.g. ${1:myFunctionName}) that can quickly be toggled through!
Pro tip: For a more global handling of snippets and generally more awesome copy-pasting power, you should take a look at clipboard managers like CopyQ (multi-platform), Pastebot (MacOS) or ClipboardFusion (Windows).
Emmet’s Expand
Emmet has been around for a while already but many developers haven’t heard about it or used it yet. It’s even included in VS Code by default, so you can start using its features without any extension.
<!-- Write this: -->
table.table.table-hover>thead>tr>th*3^^tbody>tr>td*3

<!-- ...and expand into this! -->
<table class="table table-hover">
  <thead>
    <tr>
      <th></th>
      <th></th>
      <th></th>
    </tr>
  </thead>
  <tbody>
    <tr>
      <td></td>
      <td></td>
      <td></td>
    </tr>
  </tbody>
</table>
Emmet’s main purpose is to quickly generate HTML structures by using a CSS-like syntax like in the example above (the command for this is Expand Abbreviation, available via the tab key by default). Emmet even adapts to React’s JSX syntax by using className instead of class.
Pro tip: If you need some sample text content, try expanding lorem via Emmet!
We’ll look at some more of Emmet’s features throughout this post!
Emmet’s Wrap with Abbreviation
Don’t write HTML tags twice to wrap an existing element — use Wrap with Abbreviation instead! Ah, automation…

Similarly, the extensions Auto Close Tag and Auto Rename Tag help you by closing and renaming the matching HTML tag (or React component) automatically.
Toggle Comments
It’s easy to toggle line and block comments with VS Code (always using the right syntax for the current language)! Here are the commands with their default assignments:
- CMD+Shift+7 — Toggle Line Comment (Ctrl+Shift+7 on Windows)
- Alt+Shift+A — Toggle Block Comment
Increment (and decrement)
If you’re using Chrome’s dev tools to analyze and debug CSS, you might be aware of the nice little keyboard shortcuts to increment and decrement values (e.g. for quickly adjusting pixel or percentage values). You can get the same functionality within VS Code via the (somehow relatively-unknown) Incrementor extension!

Incrementor’s and Emmet’s commands for incrementing/decrementing values (although you should really just use the handy keyboard shortcuts that come with the extension).
Checkout this gist for some more helpful enumerators (mainly for CSS properties).
P.S.: Emmet’s built-in Increment/Decrement commands offer similar functionality already but they’re not as powerful and comfortable to use as the Incrementor extension.
Embrace the camel and the kebab
Programmers thought of different ways to capitalize variables in code and different situations call for different (funnily-named) capitalizations. Change Case is here to help us with that and is one of my favorite extensions! It lets you easily change the case of a text selection — useful when refactoring variables into constants or quickly translating between camelCase and kebab-case for AngularJS projects.

Not a camel but a vicuña that’s winking at you for using your editor efficiently.
If you’re working in camel case a lot and just want to select single words within the variable name, you’ll have a bit of trouble as that’s not directly supported in VS Code — unless you’re using the Select part of word extension!
Code Navigation
Since we’re talking about efficiency, we should look at ways to navigate through codebases in an efficient manner — that usually means fewer mouse interactions and more shortcuts instead. ⚡
Switching Workspaces
VS Code refers to (sets of) opened folders as workspaces. You can easily switch between recently-opened workspaces by hitting Ctrl+R (Open Recent) — no need to always open the file dialog for this!
If you need a more sophisticated management of workspaces, you might want to use the extensions Project Manager (for manually persisting your workspace setups) or Git Project Manager (which will keep track of all git projects in a specified base folder).
Go Back/Forward
Especially when handling multiple or larger files it’s easy to lose overview after jumping around between different spots in the code. What helps me a lot is having the possibility to navigate back and forth between cursor positions (that also works across files!).
- Ctrl+Minus — Go Back
- Ctrl+Shift+Minus — Go Forward
If you want to mark a specific piece of code to return to it later (e.g. to discuss it with a colleague), you can totally use the Bookmarks extension for that!
Focus Panels
VS Code consists of different panels containing the editor(s), filetree, search, problems etc. — you can easily toggle and/or focus those via these default shortcuts:
- CMD+Shift+E — Explorer/Filetree
- CMD+Shift+F — Global Search
- Ctrl+Shift+G — Source Control
- CMD+Shift+X — Extensions
- CMD+Shift+M — Problems
- Ctrl+Shift+´ — Integrated Terminal
- CMD+1 — 1st editor
- CMD+2 — 2nd editor (and so forth…)
Finding that matching Bracket…
…can be hard! Fortunately, someone invented Bracket Pair Colorizer which does what it says: Color all kinds of matching brackets in the same color. This also greatly helps when analyzing complex regular expressions.
Ah, brackets in colors. You can quickly see which level of nesting you’re working in.
Go to Bracket/Matching Pair
Speaking of Brackets: You can easily jump to the matching bracket with the Go to Bracket command. This way you can move the cursor to the end of a function or class without screwing scrolling around. Additionally, Emmet offers a similar built-in command that works for matching HTML elements: Go to Matching Pair. Here you can see the two commands in action:
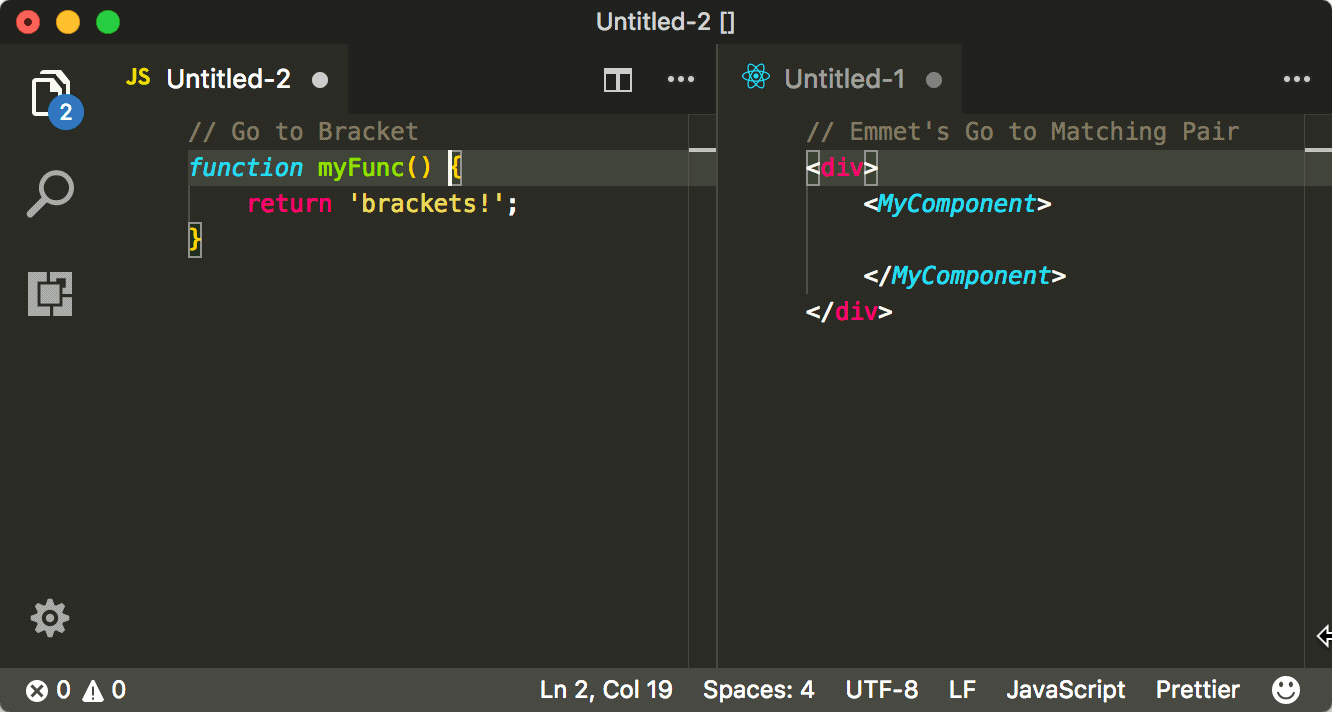
While “Go to Bracket” selects the matching bracket, “Go to Matching Pair” will jump to the matching HTML tag (or React component).
I assigned two custom keyboard shortcuts for these commands to play along nicely:
{
  "key": "cmd+shift+[Backslash]",
  "command": "editor.action.jumpToBracket",
  "when": "editorTextFocus"
},
{
  "key": "cmd+shift+[BracketRight]",
  "command": "editor.emmet.action.matchTag",
  "when": "editorTextFocus"
}
This way I can use both commands when editing JSX code (which mixes HTML-like markup and regular JavaScript).
Pro tip: If you’re using React with JSX files, you can enable Emmet features for those with this entry in your user settings (settings.json):
"emmet.includeLanguages": {
  "javascript": "javascriptreact"
}
Emmet’s Select Next/Previous Item

With Emmet’s Select Next/Previous Item commands you can quickly jump to the next or previous meaningful part of HTML markup, taking into account the element names, props and prop values (and ignoring uninteresting parts like the closing tags). This leads you to the intended code part much quicker than jumping to the next word, end of the line or alike!
Expand/Shrink Selection
With these commands you can expand or shrink your selection in a smart way, taking into account existing quotes, brackets and other syntax — that’s especially fun when working with nested JavaScript objects!
The shortcuts for these commands are by default placed on a key combination that will break all of your fingers at once: CMD+Ctrl+Shift+Left/Right. I decided to put them on a more accessible shortcut — this is how I configured them in my keybindings.json:
{
  "key": "ctrl+right",
  "command": "editor.action.smartSelect.grow",
  "when": "editorTextFocus && !editorReadonly"
},
{
  "key": "ctrl+left",
  "command": "editor.action.smartSelect.shrink",
  "when": "editorTextFocus && !editorReadonly"
}
Other integrated features
Even without extensions VS Code already offers a nice set of core features that aren’t necessarily easy to find.
Use the integrated Terminal
Yes, you’ve read that right — VS Code offers its own terminal you can use without leaving the editor. Use the command Toggle Integrated Terminal to show the terminal panel.

With this terminal at your exposal, you could think about running continuous build or test scripts in there to give you immediate feedback while having its code not too far away.
Make sure to use your shell of choice with this entry in your user settings (settings.json):
"terminal.integrated.shell.osx": "/bin/zsh"
And if you want to stick to an external terminal of your choice, you can define it as well and directly open it via Open New Terminal.
"terminal.external.osxExec": "iTerm.app"
Split your Editor
Especially when you’re working on multiple files at the same time, splitting your editor either vertically or horizontally (splitting in both dimensions is not supported yet) might help you out!

You can also show an interactive Markdown preview while you’re working on Markdown source (via Open Preview to the Side or this extension) — this might spare you some trouble before committing any faulty README.md.
Manage your Setup
Extension Recommendations for each Project
Setting up your own editor is great and all but most developers are working in teams and thus need a setup that reliably works for multiple people. Dictating which editor and extensions to use shouldn’t be the solution here, as many people will want to stick with their individual setups (aside from the build/test/deploy toolchain). What you can do however is recommending extensions on a project basis.
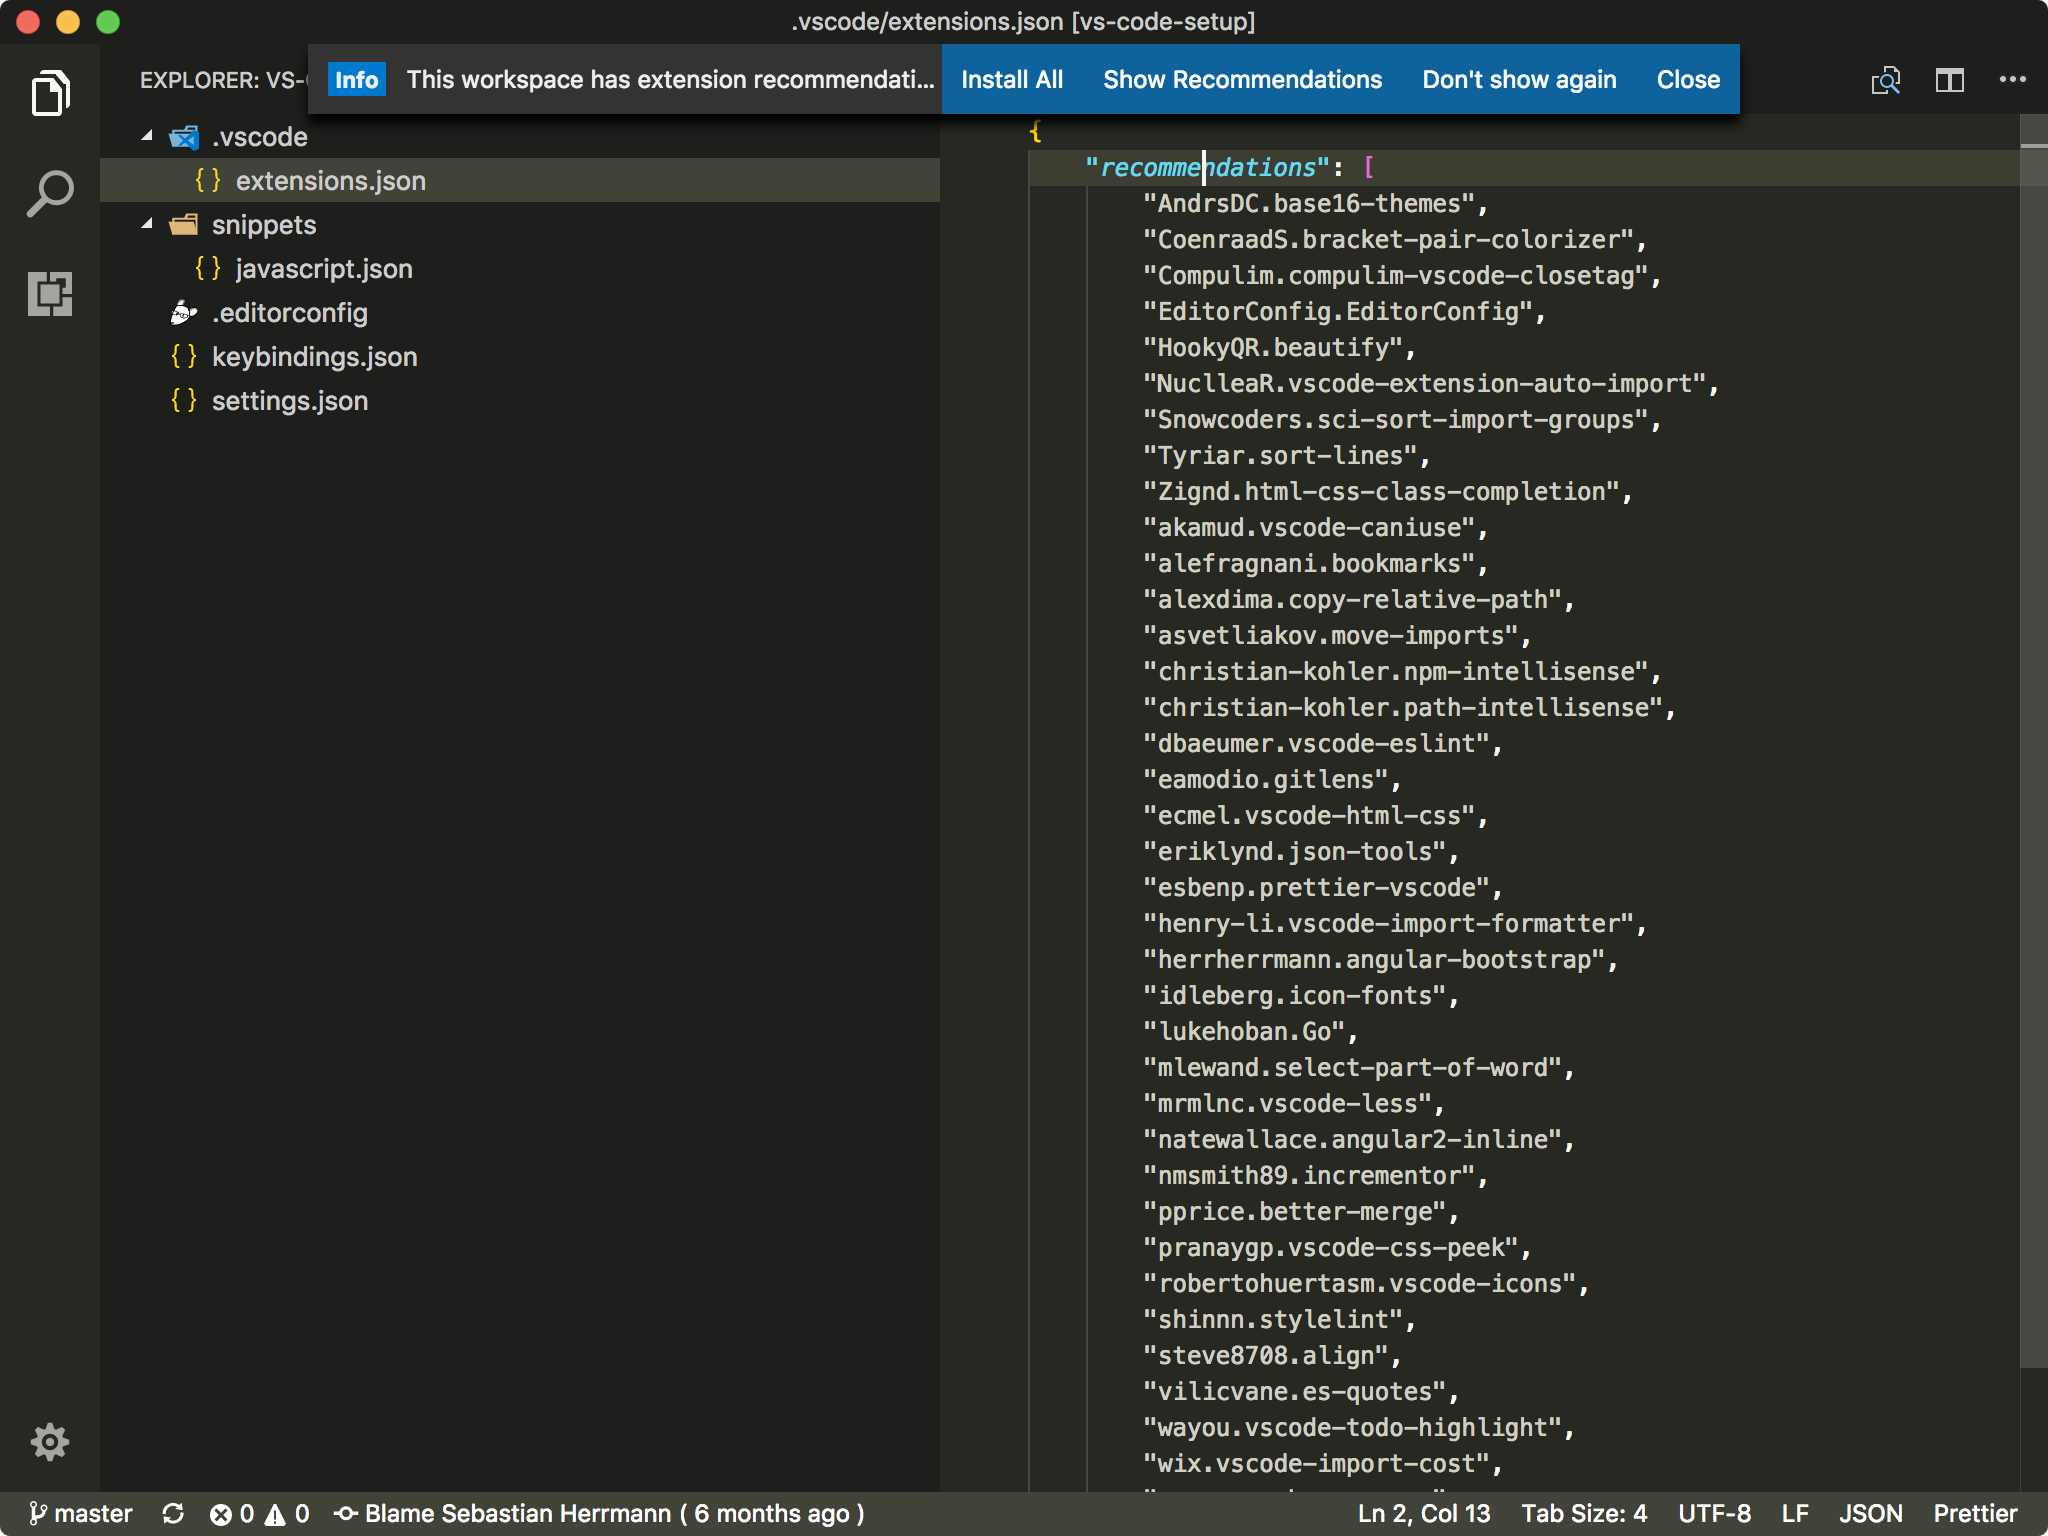
VS Code suggesting to checkout the extension recommendations for this project folder.
In your project’s root folder you can add a .vscode/extensions.json file and include a list of extensions (with their unique identifiers), like so:
// .vscode/extensions.json
{
  "recommendations": [
    "CoenraadS.bracket-pair-colorizer",
    "Compulim.compulim-vscode-closetag",
    // and more...
  ]
}
Keep your Settings in Sync
I have a little repo that helps me keep my settings, snippets, keybindings and extensions in sync (and it’s easy to point people there if they have questions about my setup). And for even more comfort you might want to checkout the Settings Sync extension that offers similar functionality (by using GitHub gists in the background).
That’s it?
Definitely not. That’s just my list of favorite features and extensions for VS Code, being an Angular/React/node web developer. You can find lots of more resources online and especially in the Extension Marketplace and the curated awesome-vscode list. I encourage you to check those out regularly as the ecosystem is steadily growing. And of course don’t hesitate to contribute yourself with an extension, even if it’s just a set of useful snippets for your language or framework of choice — chances are high that whatever helps you will also help a fellow coder!
In that sense: Enjoy Code and have a productive day!